
Among the roofing materials in your roofing system, roof flashing materials are important for preventing water intrusion. Roof flashing issues can lead to huge problems that cause costly damage. Therefore, roof leak detection is critical to stay on top of to prevent water damage from roof leaks that get into your interior and destroy your picture-perfect home.
Pinnacle Home Improvements encourages you to inspect your roof for damage and follow leak prevention tips to keep your home structurally sound. In this blog post, we discuss the role of roof flashing, how to spot a roof leak, and what to do if you find a problem.
Understanding Roof Flashing
Roof flashing is the material used to prevent water from getting inside your home, particularly in more vulnerable areas.
Definition and Purpose of Roof Flashing
Flashing is essentially a barrier that diverts water from the roof plane and vertical surface areas like chimneys, roof valleys, and skylights, which are more likely to suffer leaks if they lack proper sealing. Roof flashing allows for water flow to go over its material, onto the shingles, and keeps the roof deck protected from damage. Damaged flashing is a huge concern as it can leave your entire home vulnerable to water intrusion.
Common Materials Used in Roof Flashing
Galvanized Steel Flashing
Steel flashing is one of the most common flashing materials as it’s cost-effective while resisting corrosion.
Aluminum Flashing
Aluminum is another common choice for flashing. This material is lightweight and resists corrosion, an ideal choice in many climates.
Copper Flashing
Copper offers a nice aesthetic while being incredibly durable.
Other Flashing Materials
In addition to metal flashing, lead, zinc alloys, rubber, and plastics may be used for flashing materials.
There are different types of flashing used in specific locations on the roof, such as drip edge flashing, counter flashing, step flashing, apron flashing, and valley flashing. Roofing professionals must ensure proper flashing at the right points to provide the best protection from water intrusion for your home.

How to Identify Roof Flashing Leaks
When a roof leak has bypassed the roof decking, you will have huge problems if you don’t do something about it quickly. Many homeowners wonder how they can tell if they have a roof leak. You may spot missing or damaged shingles, but those might not be the only clues, especially if there’s an issue with flashing.
Visible Water Stains on Ceilings
One of the key signs that you have a roof leak in need of roof repairs will be on the wall, quite literally. Walls and ceilings with yellow or brown stains mean water has been leaking into your home.
If you see these stains growing larger after it rains, get a professional roofing company out to fix them. Damaged or missing shingles could be the starting point of a roof leak, though the flashing beneath can let the water in, leading to these stains, peeling paint or wallpaper, and telltale musty odors.
Presence of Mold and Mildew in the Attic
If you have a roof leak from your flashing, you will likely spot the signs in your attic. Dark spots or patches on the wood, ceiling joists near roof penetrations, or the insulation will indicate mold growth.
Even if you don’t see mold or mildew, if you feel any areas that are wet or see discolorations along with musty odors, you should contact a professional roofing contractor to fix a roof leak.
Unaesthetic Appearance of Flashing
Whether your flashing and shingles were improperly installed or incurred damage from a storm, you may visibly see it looking unsightly with missing, broken, or curled shingles. Asphalt shingles are designed to keep water away from the interior portion of your roof, and when they’re compromised, water can seep underneath and get to the flashing.
The flashing itself, whether counter flashing, drip edge flashing, or step flashing, could be noticeably impacted at the roof joints. If you see any gaps, rust, or corrosion during regular roof maintenance or after harsh weather, hurry and make minor repairs fast before they allow more water to penetrate the structure.
Another visual cue that homeowners often overlook is when there are leaves or moss on the roof. These items, along with other debris, can trap water against the flashing. In time, step flashing will deteriorate and create a roof leak.
Other Troubling Signs
If you didn’t see damaged shingles or noticeable flashing damage in your roof valleys, you may feel relieved. However, a roof leak can also sneak through and drip water near your vents or light fixtures. The ceiling may sag or warp, which is a huge safety concern that requires immediate professional intervention.
In the attic, if you see light coming through your roof near the edges of the flashing, you don’t need to wait for water to come through, too. It’s an indication that your flashing was improperly installed. In many cases, water can travel along the beams, and the origin of the leak might not be directly above where you’ve found the water stains on your ceiling.
A leaking roof, no matter what causes it, can impact a roof’s structural integrity. Contact a professional roofer right away to repair leaks and prevent further damage.
Causes of Roof Flashing Leaks
Along with roof shingles, flashing needs to be in tip-top shape to protect your home. Here’s a look at what causes a leaky roof:
Improper Installation
Whether on a flat roof or sloped roof, flashing needs to be fitted properly and secured to the roof deck and other materials to create a watertight seal. When sealing isn’t done right, whether near a vent pipe or two roof slopes, gaps will be left where water can get in.
Flashing protects the interior of your home, but it can only do so with proper installation. Any nails or fasteners that have not been installed with precision, especially at the point where a roof intersects with other parts, can leave your home vulnerable to the elements.
Weather Damage
Even when installed correctly, a roof can be susceptible to water damage after enduring high winds, which can blow flashing away from the roof or suffer impact from debris. Heavy rain and snow can also saturate the flashing, and temperature fluctuations can cause it to expand and contract, making it crack and leak.
Wear and Tear
An older roof is more vulnerable to water damage due to corrosion of metal flashing, leaving it vulnerable to developing holes. It can also become brittle as it ages or endure punctures from debris over the years. Any missing flashing is also a huge concern as it leaves your roof without the protection it needs to stay structurally sound.
Many people, especially new homeowners, don’t realize that all roofs require maintenance. While some materials are easier to maintain than others, it’s vital to have yearly inspections and make any repairs right away to stop problems before they can start.
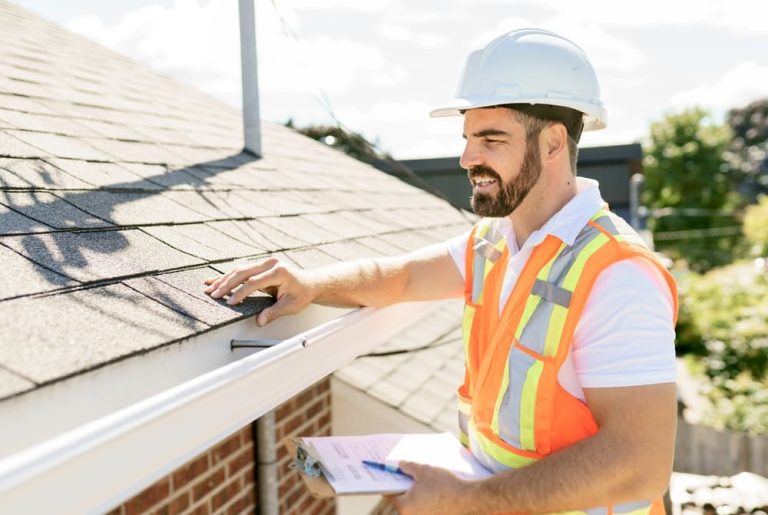
How to Inspect Roof Flashing
Identifying the early signs of wear is the key to preventing a problem with flashing and your roof surface. Follow this routine roof inspection checklist:
Conduct a Ground Inspection
Homeowners should take a walk around the perimeter of their home and take a look at the roof from the ground. Binoculars can help you zero in on roof features like the chimneys and vents to see if there are issues with the flashing or shingles.
Inspect the Flashing
If you’re capable of getting up on a ladder, see if you can find any rust, cracks, or tears in the flashing. Flashing is most vulnerable around chimneys, valleys, vents, and skylights, and these areas must be thoroughly checked. Even if you feel comfortable taking a look yourself, it’s always best to have a professional roofer take a look at all areas of your roof for a thorough inspection.
Check Shingles and Other Areas
Missing shingles or damaged shingles may signify issues with the flashing beneath them. You might notice that your shingles have lost a lot of their granules or that you have patches of moss and algae. A roofing contractor can conduct a deeper investigation into the condition of your roof and make the necessary repairs.
An easier way to look for issues is to check your gutters. First, clear them of debris and take a look to see if you’ve found rusting, shingle granules, or other signs of wear. In your attic, look for any water intrusion signs from mold or wood rot. If you can’t get up into your attic, look at your ceilings and walls for the telltale signs of leaks.
Steps to Fix a Roof Leak and Repair Damaged Flashing
If you detect leaks, you may be tempted to make your own repairs. However, due to the many structural elements involved and to protect your property, it’s best to have a professional help you fix any damage to the flashing. In some cases, sealing flashing by applying roofing cement can help, though it may not help you avoid costly repairs.
Contact Pinnacle Home Improvements to get the sound advice you need on keeping your roof structurally sound.